She’s finally finished!

VITAL STATISTICS:
Pattern: Mandala, originally known as the Goddess Knits Anniversary Mystery Shawl
Made for: My mother-in-law, The Master, who has showered me with gratitude and compliments since receiving the shawl.
Yarn: KnitPicks Gossamer (now discontinued)
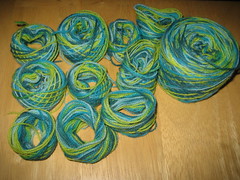
Yardage: I’d estimate I used more than half of the final skein, so 3.75 skeins, about 1650 yards
Yarn Source: KnitPicks and the generosity of Ravelers. I realized that I needed more than I had of this now-discontinued yarn. I searched other Ravelers’ stashes for the exact dye-lot I needed, and ended up swapping for the extra yarn.
Needles: US size 4 KnitPicks Options circular needles, US size 3 KnitPicks Harmony DPNs from my set.
Modifications: Although I didn’t modify the pattern at all, one of the coolest parts of the Mandala pattern was the choose-your-own adventure element of the charts. To my horror as I write this, I realize that I cannot remember which charts I used for the first three sections of the chart. For chart 4 I used chart B.
Looking back at my photos and the charts, I’d guess I used chart 1B, 2C, and 3D.
RESOURCES:
I followed along with the Ravelry group for the Goddess Knits Anniversary Mystery Shawl knit-along, which was very helpful, and also got chart updates and info from the Yahoo Group (although I believe the Yahoo group is now closed to new members).
SMOOTHING OUT THE TANGLES:
The Cast-on:
I started this circular shawl with my old favorite standby, the Emily Ocker circular cast-on. I used size 3 dpns to start with so that I wouldn’t have to worry too much about keeping the tension snug as I worked the hardest part of a circular shawl: those first few rows!

A helpful hint for getting circular shawls started: put your work on a pillow and turn the pillow as you knit around instead of trying to turn the work itself. Using a pillow can really help stabilize your knitting in the very delicate early stages.
Choose your own adventure:
This shawl is a variation on Elizabeth Zimmerman’s Pi Shawl. Instead of one pattern worked all the way through, each section offers a choice between four patterns. A little basic probability math tells us there are 256 possible shawls that can come out of this pattern! Such a cool idea!
The charts:
I worked chart one on size 3 DPNs and switched to size 4 circs once I got past the increase at the end of chart 1. I find that knitting the beginning rounds of a circular shawl works well because the smaller needles help keep the tricky beginning snug.
A tip (that I did not put together until the end of chart 4 but that will probably be obvious to most people): I was initially intimidated by the shaded rows, where the instructions say to knit one extra stitch in the plain round before the shaded row (also known as moving the stitch marker one stitch to the left). Once I actually did this the first time it made complete sense to me. I also noticed an interesting pattern feature of the shaded rows. Each shaded row ends in a double-decrease, where the instructions say to slip two stitches together as if to k2tog, then knit the next stitch, then pass the two slipped stitches over. Because the pattern repeats of the shaded rows are shifted to begin one stitch to the left, it follows that they will also END one stitch to the left. This means that when working the shaded rows, you can always check yourself to make sure you are on track by noticing that at the end of each repeat you slip the two stitches as if to knit, remove your pattern repeat marker, knit the next stitch and pass the two slipped stitches over, and replace your pattern repeat marker.
I was a bit behind the knitalong group – it always amazes me how people can knit an entire large clue in just a week! It worked out well though, because I got a sneak peek at how each chart choice came out and I selected accordingly.
Edging:
One of the things I liked about using the varigated yarn was the way the edging changed:

As you can see, the striping was horizontal for the body of the shawl and then became vertical in the edging. The visual impact of the perpendicular lines of color was very striking.
The effect was even cooler after blocking:

Now that I’ve done two shawls in the round, I can’t imagine that I would ever choose to finish a shawl without a knitted on edging instead of a traditional bind-off. Because of the extent that lace must be stretched for blocking, I would not want to be confined to a tight bind-off that would prevent the lace from being as lacy as possible. Yes, a perpendicularly knitted edge does take a LOT longer than a regular bind off, and it does involve grafting, but ultimately it is worth it.
Grafting means using the principles of Kitchner stitch to bring the end of the edging together with the beginning. Unlike regular Kitchner stitch though, you must incorporate all of the elements of the lace pattern as you weave the two ends together. Grafting this shawl edging together was an exercise in patience and steel nerves. I banished The Baron to his cave and worked in near-total silence for about 45 minutes before I was finally able to breathe. Perhaps I’ll be able to speak of the experience in more detail later, but let me just say that grafting lace is not for the faint of heart.
I STRONGLY suggest using this technique. It’s the one I’ve used for both of my in-the-round shawl projects and at this point the only way I know of to successfully execute this delicate operation.
Blocking:
Over the course of working this shawl, I noticed that the yarn seemed a bit sticky, so I was extremely concerned about felting. I did my usual warm-water wash in the kitchen sink with a cap-full of Soak woolwash. I squished the fabric down into the bowl once and flipped the whole thing over once, but mostly I just left it alone. I can’t say why, but I am a sucker for soaking photos, so here’s photographic evidence of my kitchen sink and metal mixing bowl:

After the first hour-long bath, the water was very green, so I did another bath in plain water for an hour. The shawl still was not rinsing clean, so I repeated the hour-long dip in lukewarm water with another cap-full of Soak wash and after a final soak in plain water (4 soakings in total!) the water was much more clear. I gently wrangled the wet beast out of the bowl, let it drip for a minute into the sink, and then spread it out onto several towels that I rolled up. I had The Baron apply his gigantic flat feet to the towels and then unwrapped the shawl and spread it out on our guest bed for pinning out.
I started by pinning out the edges of the shawl in quarters, sticking a pin in the north, south, the east and the west-most points. From there I added a few pins to each section. Once the shawl started stretching out, I was able to re-position my original four pins to get even more diameter to the shawl. When I’d gone as far as I felt I could, I got out my yardstick and measured the radius of the shawl at several points. The largest radius I got was 31 inches from center to edging point, so I began working my way around the shawl, pinning each edging point out or readjusting the existing pins to get a 31 inch radius.
Once again, the magic of blocking blew me away, turning this:

into this: